As many of you know, we recently acquired a Ranch in Wyoming - one of the most "food freedom" honoring states in the US. We have a guest facility there, perfect for the Carbon Vault school that teaches young, energetic Interns and students how Regen AG works.
You may also know, that the dying conventional milk industry is on life support. This is not a new thing as US dairies have been perishing for years now. It used to be a substantial industry, but with the Farm Crisis of the 80's (read Harvest of Rage, by Joel Dyer), the expansion of Government Subsides (yes, that actually hurts small farms like ours) and the general de-population of youth from rural areas, the industry is almost non-existent anymore.
Dairy farmers struggle with the low compensation they receive for their milk compared to the estimated cost of production, which can range from $1.90 to $2.50 per gallon according to industry sources. In February 2023, the average price farmers received for milk in the United States was approximately $1.58 per gallon, according to the United States Department of Agriculture (USDA).
That is astonishing - if we take the lowest estimated cost of production of $1.90 per gallon and the average price received by farmers of $1.58 per gallon, the gross margin is -$0.32 per gallon, which means that farmers are losing approximately 32 cents for every gallon of milk produced.
To combat this, the dairy industry has tried to prevent competition thru legislation. One of those rules is the prohibition of inter-state commerce of Raw milk.
Yes, that is a rule.
At the Federal Level, you cannot ship milk for sale from an outside state (i). Each state is different, but for the most part, according to the FDA, crossing state lines to sell milk, somehow, magically makes it suddenly poisonous.
But... and here is a big "but" - the transportation of your personal groceries is not prohibited at the state level, by FDA, or any other dictator, tyrant or potentate.
In Wyoming, the sale and distribution of raw milk is legal, but it is subject to certain restrictions. Specifically, raw milk can only be sold on the farm where it was produced. (ii) In California, the sale and distribution of raw milk is also legal, but it is subject to stricter regulations than in Wyoming. Raw milk can only be sold on the farm where it was produced or at certified farmers markets, and the seller must obtain a permit from the California Department of Food and Agriculture.(iii)
The cost to obtain these permits and be inspected could run north of one million dollars.
So, given these restrictions, let me ask you some basic questions?
1. Is it legal to hire someone to "board" a that Cow you personally own?
2. Can more than one person own a Cow?
3. Can you hire someone to milk a Cow for you?
4. Can you consume Raw milk from a Cow you legally own?
If you answered yes to all four of those questions, you might be a candidate for a "Raw Milk Cow Share".
A "Raw Milk Cow Share" typically refers to an arrangement where individuals collectively own a cow (or cows) and hire a farmer or other individual to care for and milk the cow(s) on their behalf. Each member of the cow share typically pays a fee to purchase a portion of the Cow and cover the cost of the cow's care, and in exchange they receive a share of the raw milk produced by the cow.
From a legal perspective, a raw milk cow share is generally considered a private contractual arrangement between the cow owners and the farmer, rather than a commercial sale of raw milk. This is because the raw milk produced by the cow is not being sold on the open market, but rather is being consumed solely by the owners of the cow share.
A cow share agreement is generally considered a private contractual arrangement between individuals for the purpose of obtaining raw milk for personal consumption, rather than a commercial transaction. As such, the transportation of raw milk in a cow share agreement would typically fall under the jurisdiction of state and local regulations regarding raw milk, rather than federal regulations.
At our first Ranch, located in California, we offered "Raw Milk Cow Shares" on our five Jersey Cows. Jersey's are a heritage breed Cow with exceptional Milk quality (up to 25% Cream was common). Each Cow had five owners on it, plus our majority share (51%). We had first right to buyback if someone wanted to sell their share. We were members of the Farm to Consumer Legal Defense Fund to protect us in the event a helicopter hovered over our Ranch to deploy a SWAT team and take out our milk supply.
Unfortunately, we did not continue this program, as it was very cumbersome to deliver the product. However, now the world has changed. We could easily overcome that obstacle with the technology and services we have today.
This might be the perfect solution to our ranch dilemma. We want to train our Interns and Students on milk cows, but don't want to dump the milk out. The ranch in Wyoming is incredibly remote, but with good, high quality grass, that milk cows need. The surrounding population is sparse and would not support the milk herd.
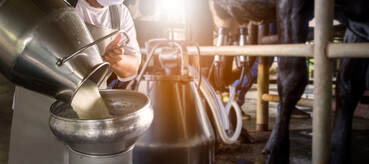
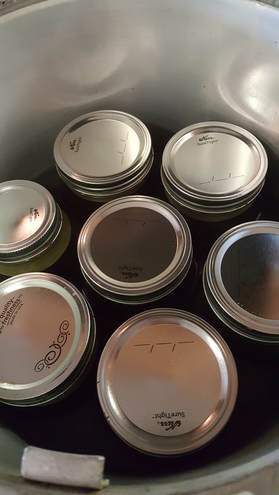
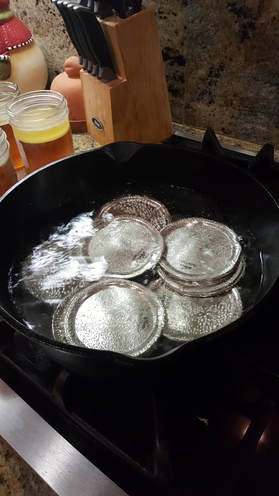
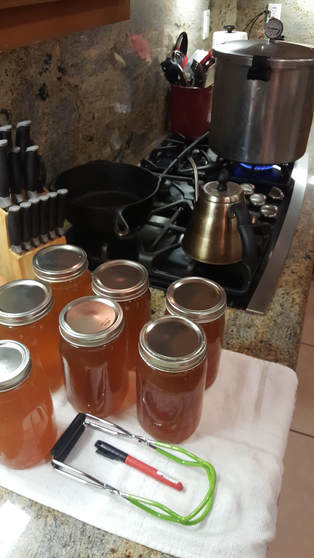
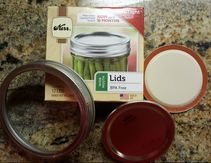
We envision a system, like we piloted in California where we board and milk your Cow for a fee. We could bottle your property in clean glass bottles and send out on the next truck. Each time you empty a bottle, send it back in the insulated shipper. We will sterilize and refill for the next recipient. Maybe in the future we could include cream and butter. The fees would likely include...
And, it's a system that actually works - plus it is legally protected (so far).
What are your thoughts on this?
To help us understand the general desire and demand for something like this, would you be kind enough to complete the survey below?
PS - I will post the results to the Survey in a few days.
Thanks,
Doug Lindamood
Chief Piglet Chaser, Chicken Whisperer and Calf Wrangler
SonRise Ranch
You may also know, that the dying conventional milk industry is on life support. This is not a new thing as US dairies have been perishing for years now. It used to be a substantial industry, but with the Farm Crisis of the 80's (read Harvest of Rage, by Joel Dyer), the expansion of Government Subsides (yes, that actually hurts small farms like ours) and the general de-population of youth from rural areas, the industry is almost non-existent anymore.
Dairy farmers struggle with the low compensation they receive for their milk compared to the estimated cost of production, which can range from $1.90 to $2.50 per gallon according to industry sources. In February 2023, the average price farmers received for milk in the United States was approximately $1.58 per gallon, according to the United States Department of Agriculture (USDA).
That is astonishing - if we take the lowest estimated cost of production of $1.90 per gallon and the average price received by farmers of $1.58 per gallon, the gross margin is -$0.32 per gallon, which means that farmers are losing approximately 32 cents for every gallon of milk produced.
To combat this, the dairy industry has tried to prevent competition thru legislation. One of those rules is the prohibition of inter-state commerce of Raw milk.
Yes, that is a rule.
At the Federal Level, you cannot ship milk for sale from an outside state (i). Each state is different, but for the most part, according to the FDA, crossing state lines to sell milk, somehow, magically makes it suddenly poisonous.
But... and here is a big "but" - the transportation of your personal groceries is not prohibited at the state level, by FDA, or any other dictator, tyrant or potentate.
In Wyoming, the sale and distribution of raw milk is legal, but it is subject to certain restrictions. Specifically, raw milk can only be sold on the farm where it was produced. (ii) In California, the sale and distribution of raw milk is also legal, but it is subject to stricter regulations than in Wyoming. Raw milk can only be sold on the farm where it was produced or at certified farmers markets, and the seller must obtain a permit from the California Department of Food and Agriculture.(iii)
The cost to obtain these permits and be inspected could run north of one million dollars.
So, given these restrictions, let me ask you some basic questions?
1. Is it legal to hire someone to "board" a that Cow you personally own?
2. Can more than one person own a Cow?
3. Can you hire someone to milk a Cow for you?
4. Can you consume Raw milk from a Cow you legally own?
If you answered yes to all four of those questions, you might be a candidate for a "Raw Milk Cow Share".
A "Raw Milk Cow Share" typically refers to an arrangement where individuals collectively own a cow (or cows) and hire a farmer or other individual to care for and milk the cow(s) on their behalf. Each member of the cow share typically pays a fee to purchase a portion of the Cow and cover the cost of the cow's care, and in exchange they receive a share of the raw milk produced by the cow.
From a legal perspective, a raw milk cow share is generally considered a private contractual arrangement between the cow owners and the farmer, rather than a commercial sale of raw milk. This is because the raw milk produced by the cow is not being sold on the open market, but rather is being consumed solely by the owners of the cow share.
A cow share agreement is generally considered a private contractual arrangement between individuals for the purpose of obtaining raw milk for personal consumption, rather than a commercial transaction. As such, the transportation of raw milk in a cow share agreement would typically fall under the jurisdiction of state and local regulations regarding raw milk, rather than federal regulations.
At our first Ranch, located in California, we offered "Raw Milk Cow Shares" on our five Jersey Cows. Jersey's are a heritage breed Cow with exceptional Milk quality (up to 25% Cream was common). Each Cow had five owners on it, plus our majority share (51%). We had first right to buyback if someone wanted to sell their share. We were members of the Farm to Consumer Legal Defense Fund to protect us in the event a helicopter hovered over our Ranch to deploy a SWAT team and take out our milk supply.
Unfortunately, we did not continue this program, as it was very cumbersome to deliver the product. However, now the world has changed. We could easily overcome that obstacle with the technology and services we have today.
This might be the perfect solution to our ranch dilemma. We want to train our Interns and Students on milk cows, but don't want to dump the milk out. The ranch in Wyoming is incredibly remote, but with good, high quality grass, that milk cows need. The surrounding population is sparse and would not support the milk herd.
We envision a system, like we piloted in California where we board and milk your Cow for a fee. We could bottle your property in clean glass bottles and send out on the next truck. Each time you empty a bottle, send it back in the insulated shipper. We will sterilize and refill for the next recipient. Maybe in the future we could include cream and butter. The fees would likely include...
- A Cow Purchase Fee w/contract
- A Cow Maintenance Fee w/contract
- A Bottle Deposit and Cap Fee
- Shipping
And, it's a system that actually works - plus it is legally protected (so far).
What are your thoughts on this?
To help us understand the general desire and demand for something like this, would you be kind enough to complete the survey below?
PS - I will post the results to the Survey in a few days.
Thanks,
Doug Lindamood
Chief Piglet Chaser, Chicken Whisperer and Calf Wrangler
SonRise Ranch
Endnotes:
(i) The U.S. Food and Drug Administration (FDA) has established regulations that prohibit the interstate transport of raw milk for human consumption. These regulations are found in the Code of Federal Regulations, Title 21, Section 1240.61 (21 CFR 1240.61)
(ii) Wyoming: Statutes Title 35, Chapter 11, Section 101 outlines the requirements for the sale and distribution of raw milk in Wyoming. The Wyoming Department of Agriculture has also established rules and regulations regarding raw milk sales, which can be found on here.
(iii) California: CA Health and Safety Code Section 11380-11391 outlines the requirements for the sale and distribution of raw milk in California. The California Department of Food and Agriculture has also established rules and regulations regarding raw milk sales, which can be found here.


 RSS Feed